Lip Products [that I feel the need to carry around with me at all times]

So last night around 10:30 p.m, I  said good night to my man and headed to the living room. I had every intention of vegging out on the couch and browsing on my iPhone 5s (which now has a cracked screen, ever since taking a dive off the foot of my bed last week) for new blogs to follow on WordPress.

Just as I was about to sprawl my body across the couch, I  happened to glance  over at the beautiful Michael Kohrs bag my best friend bought me for Christmas, which happened to be perched on my coffee table…(did I mention that she’s better than your best friend?) The zipper was open, and it looked really full-messy full. I thought “Wow, I need to clean that out…yesterday.” Reluctantly, I sat on the floor and got to work. 

As I was cleaning gum wrappers and old credit card receipts out of my beautiful Michael Kohrs bag ( I love how that sounds),I realized that I had been carrying about a third of my lipstick/lipgloss collection around with me for quite some time. I probably don’t need to  have all of these lip colors in my purse, I thought to myself. Perhaps this is a bit excessive

So, I went ahead and narrowed my carry-around  for-the-lips collection down to 6 must-have items. I insist, I really must have all 6 of these products with me-always. I just must. 

6 Lip Products [that I feel the need to carry around with me at all times]

  1. ColourPop Ultra Matte Lip Color in  Clueless


This is a pretty,pinky-nudish color. I bought it after hearing it was a dupe for the Kylie Jenner lipkit in Candy K. I love that it only cost 6 bucks, which is way better than Miss Jenner’s outrageous price of $30.00-doesn’t she make enough money for doing nothing? I certainly think so, which is why I bought the ColourPop version of this shade. 

2. Mac Matte lipstick in Honey Love & 3. Mac Prolongwear lip pencil in Nice n’Spicy

I love this combo! It makes for a super subtle, natural nude lip. Great  for  pairing with dramatically made up eyes,  or as part of a ‘no-makeup’ makeup look.

4. Gerard Cosmetics Lipstick in Cherry Cordial


I love this smoky, sultry-dare I say it-vampy color. It is perfection. 

5. Rimmel Stay Glossy lipgloss in Blushing Belgraves

My favorite gloss formula in my favorite nude color…Need I say more?

6 . Mac Lipstick in Rebel

I honestly tried to talk myself out of throwing this color back into the bottomless hole that is my purse.Then, I thought about its pretty purpley pink (maybe more like pinky purple?) color and how irresistibly gorgeous it is. Back in the bag it went! 

Hope you enjoyed reading about my purse cleaning-lipstick  choosing adventure! Please follow me if you enjoyed this post, and would like to see others like it!

Review: Sephora’s Formula X Basecoat 

Hey all!
I wanted to do a review of Sephora’s Formula X base coat. As you know if you’ve read my previous entries, I’m a nail polish addict. I usually go no more than 48 hours (tops!) without rocking a color on my nails. Without it, I feel like something is missing. I also think it makes my (slightly) chubby, stubby fingers to look more like long, skinny piano fingers. Kind of.

 
The thing about this basecoat is that it’s very sticky, which I think helps the polish to adhere more smoothly, as well as last longer. I have definitely noticed that my manicures have greater staying power from using this product. I find that I get an extra day, maybe an extra two days, with some very slight wear at the tips of my nails. 
2 day old mani, with O.PI.’s Barefoot in Barcelona.  It lasted an additional 24 hours after this picture was taken.  

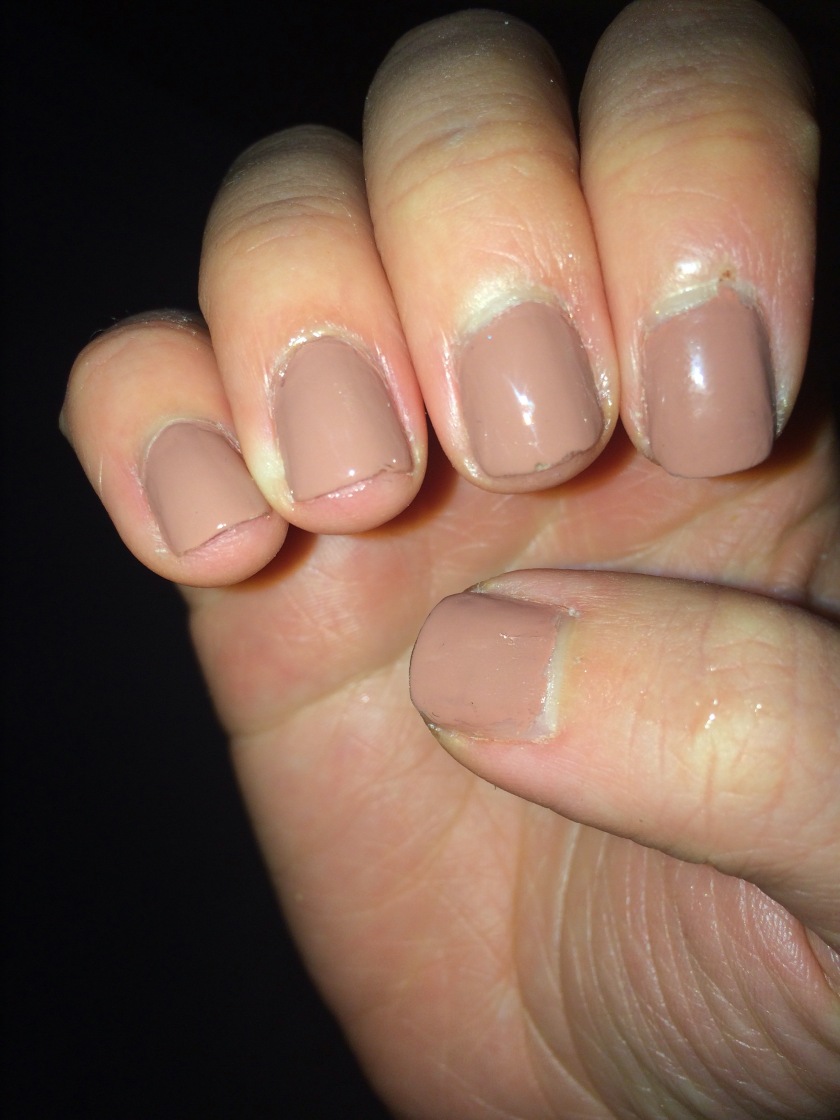
4 day old mani with Essie’s Mochachino-not too shabby 🙂
  
Confession: I have a tendency to be kind of rough on my hands, especially when I’m cooking and cleaning/ washing dishes. I don’t think that someone like me could ever realistically get a week’s wear from regular polish. Using rubber gloves when I do these things is helpful, but still doesn’t give me a week of beautifully lacquered nails.
Happy manicuring!
If you enjoyed this blog post and would like to see others like it, please follow me 🙂

Review of Nailhur Renewable Snap On Manicures

So, let me start this review with an honest disclaimer: I’m really a very limited individual when it comes to doing my own nails. I’m lucky I can hold a nail polish brush steady to paint them myself. I can never get those cute nail stickers by Kiss and Sally Hansen to stay on for more than  24 hours. I have no idea what possessed me to think I would be a good candidate for Nailhur press on nails.

Okay, that’s kind of a lie; I do know what possessed me. I follow a ton of beauty accounts on Instagram. I kept seeing pictures of different YouTube glamouristas sporting press on nails from Nailhur.com. The thing about Nailhur that enticed me was the fact that the nail sets come in various colors, prints, and shapes. I also liked that they were supposed to be reusable up to twenty times. I saw all the pretty girlies rocking their gorgeous  Nailhur nails and thought to myself, “I want to look fabulous too!” So of course, I went on their website  and ordered the white square shaped nails in “Cosmopolitan Chic.” I should’ve been smart and started off with just one set, but  I just  had to get carried away; I also purchased the squaletto shaped set in “Sweet Pink”. Sigh. Sometimes, I just don’t know how to quit while I’m ahead.

As you might have guessed,the Nailhur application process was nothing short of a disaster. Each set comes with 24 nails, so that you can pick the one that best fits over each fingernail. It sounds easy enough, but I definitely screwed this part up-big time. I ended up  applying a dainty, appropriately sized slender nail on my left index finger and a huge chunky nail that was probably meant for a thumb nail on my right index finger. I didn’t realize what I had done until after I had used the glue and pressed the second artificial nail down on my nail bed. I  knew at that point I wouldn’t be able to fix my mistake without ripping off several layers of my natural nail in the process. So, I decided to let it go. No big deal.

I also managed to get nail glue all over the skin on my hands. Don’t ask me how, this is me we are talking about. This wasn’t exactly a big deal either. Still, it didn’t feel very nice.

I didn’t really like wearing the Nailhur press on nails. I found them to be invasive, and even a bit uncomfortable. The best way I can think to describe them  would be to say that they felt “tight” on my nail beds.


I did receive a lot of compliments on the way that they looked. The only negative feedback I received was from my smart ass second cousin, who upon seeing my nails asked me if I had “lost a bet”. Love you too, jerk. ❤️

By the end of the day, I was completely  over my snap-on manicure. I wasn’t too worried about removal , as I had read that  they were supposed to soak off with hot soapy water. Lol, yeah right! After trying to soak them off this way for nearly an hour, I resorted to using the extra press on nails from the set to pry them off. As you can imagine, there was a shit ton of damage done to my natural nails as well as the press on nails. Reusable? For this girl? Not a chance.

I tried to weaken the glue by soaking  my nails in acetone nail polish remover , which you aren’t supposed to do if you intend on reusing the Nailhur. I figured there was no additional harm being done, as I had already damaged nearly all of the press on nails beyond recognition. This helped a lot. I managed to successfully remove all but two of them. My pinky and my thumb press on nails  still didn’t want to budge. I ended up cutting them down to nubs and picking at them myself. It took about a day and a half for them to fall off. As you can imagine, my natural nails were slightly thinner and noticeably scratched up from this process.

While my experience with Nailhur was unfortunate, I will admit that it is probably one that only I would have. I’ve seen several reviews on YouTube, all of which have been pretty positive. I think I may have used too much glue. Maybe I would have had better luck if I had used it more sparingly. Or maybe I should have used adhesive tabs instead of nail glue. The thing is, I’m way too traumatized from my previous experience to give Nailhur another shot. Lol #butreally

If you enjoyed this post and would like to see others like it, please follow my blog.

Self-Made Manicure: My Favorite Nail Products

Disclaimer: I am not being paid or compensated in any way to recommend the products mentioned in this blog entry. With that being said, if there is a company in existence that would like to give me free stuff and/or pay me to provide an honest  review of their product, I would definitely love that. Let me know, ok?

Hi!

So I’ve been wanting to do this post for quite some time now. I’m a huge girly girl, and so naturally I like to keep my nails painted as much as possible. I used to have a gel overlay on top of them, which meant I had to haul my ass to the salon to get them filled every three or four weeks. My gel nails were ridiculously glamorous, but also ridiculously expensive. I’m a poor  graduate student, and so I typically try to keep my beauty routine as low maintenance (meaning cheap, lol) as I possibly can. I’ll be honest, painting my own nails isn’t the most relaxing activity in the world. It also doesn’t last nearly as long as a gel manicure from the  salon would. I usually get about 3 days of wear from each manicure. Still, the products I use allow for a smooth application. My nails always dry quickly, which is super convenient.  Painting them at home is  an easy process, and I like that it saves me money. Read on for my favorite self-made manicure products  🙂 I have included links to purchase each of them down below.

Base Coat:

I always use OPI Natural Nail base coat. I love how thin it is-I often look twice at my nails after I’ve applied it and go, “huh, did I space out and forget to use a base coat?” It looks like normal nail protector going on, and then seems to evaporate within seconds. Pretty neat.

Nail Color:

I use whatever, honestly. I have a few of the expensive polishes by Essie and OPI.  I recently  bought a Sephora for OPI 10 piece collection from amazon.com. You get ten beautiful, high quality colors for only 24.99!  (Reminder- I’ve included a link act the bottom of this entry!)  I’m also not afraid of the cheaper brands. I have polish from N.Y.C and Revlon. When I was in Mexico, I purchased this beautiful pink color from a brand I’ve never heard of for less than 100 pesos (about $6.00 in the United States). I’ll try anything that looks pretty.

Top Coat:

I will only use HK Girl  Glisten and Glow Fast Drying & Super Shiny topcoat. My friend Deana recommended it to me a couple of months ago. She is a  fellow girly-girl/nail polish addict, and so I tend to trust her product recommendations. This topcoat is phenomenal. True to it’s name, it is super glossy, and dries within minutes. It will not  cause your color to flake off sooner, the way that a lot of fast-drying formulas will.

Easy Removal:

I’m the type of girl who removes her nail polish thirty seconds after it begins to chip… I have a Type A personality, we’ve been through this before… I’m sure you could’ve guessed that chipped nails absolutely-positively irk me to my core. When the moment I’ve been dreading  inevitably happens, I break out my Cutex Twister nail polish remover. I use the one that is labelled “for hard to remove nail polish.” I insert each of my fingers  into the container  (one at a time) and gently rub my nail beds against the  sponge inside. There is also a scrub brush, but I have found that  it is not as effective as the soft sponge. My nail polish always comes off very easily. If I have  glitter  on my nails, I may need to dip them another time or two, which isn’t half bad. For me, removal takes about two minutes-tops!

You can purchase my nail favorites by clicking on the links below!

OPI Natural Nail Base Coat

10 pce Sephora by OPI

Hk Girl Glisten and Glow topcoat

Cutex Twister Nail Polish Remover

Please follow me if you enjoyed this post, and would like to see others like it.

IMG_0134